Thursday, July 15, 2010

Ways to Cook Food

Ways to Cook Food
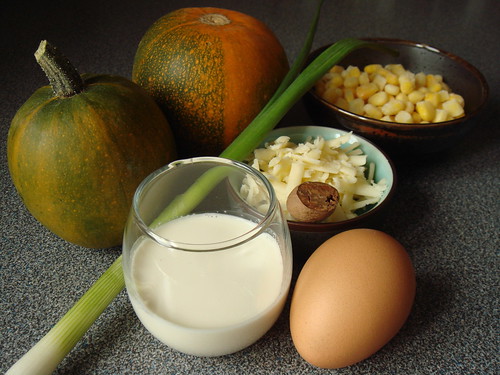
  • You take great care in choosing the right foods for your family to eat, but did you know that the way they’re prepared can have a large impact on their nutritional value?
  • Whereas some cooking methods will preserve the food’s nutrients and flavor, others can actually diminish nutrient content and create harmful substances within your food.
  • What about the microwave? While some believe microwaving is a fast way to cook food without a lot of extra oils, others believe it can change the chemical structure of the food in unknown, potentially negative, ways, while reducing fragile nutrients.
  • It is always preferable to cook foods at lower temperatures than higher temperatures, not only because the nutrients are better preserved but also because the oils that you cook your food with — particularly vegetable oils like soybean, corn and canola — are easily damaged (oxidized) by the heat, posing health risks.
  • Fortunately, there are many cooking methods out there that are good for your food and good-tasting. Here we’ve outlined some of the most popular cooking methods, starting with the healthiest methods and ending up with the worst.

1. Eat Your Foods Raw
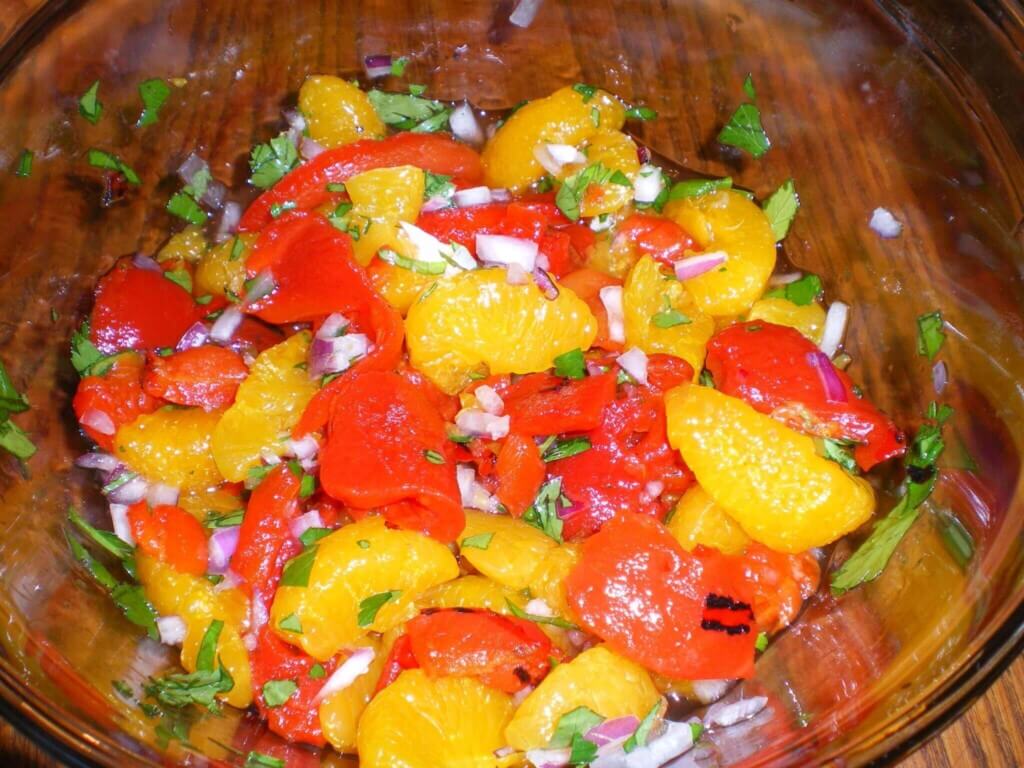
  • Well, it’s not exactly a cooking method, but it is a very healthy way to consume many of your favorite foods. Raw foods, advocates say, are higher in vitamins and nutrients, which are destroyed by cooking. Eating raw may seem extreme, but you can actually prepare some pretty tasty dishes if you know what foods to combine.
  • If you would like to try out some delicious raw food recipes for yourself, Alive in 5: Raw Gourmet Meals in Five Minutes is packed with them (raw lasagna, spaghetti marinara, stuffed mushrooms, broccoli in cheese sauce, apple pie and more). They’re healthy and delicious, even if you’re new to raw foods!
2. Steaming
  • Simply put a little water in a pot, put in a steamer basket or colander, and add your food. As the water boils, the steam will gently cook your food. Be sure not to cook your food for too long (veggies should still be brightly colored and slightly crunchy when they’re done), and you can also add some spices to the water to flavor the foods as they steam.
  • This method works especially well for fragile vegetables like leafy greens and fish.
3. Poaching
  • You can poach chicken, eggs and other foods by simmering them in a little bit of water or broth on your stovetop. Use a covered pan and take the foods off the heat when they’re tender.
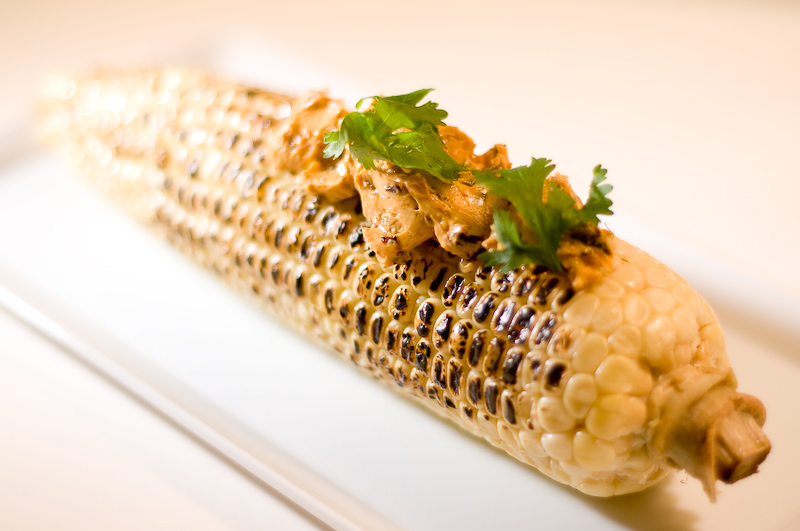
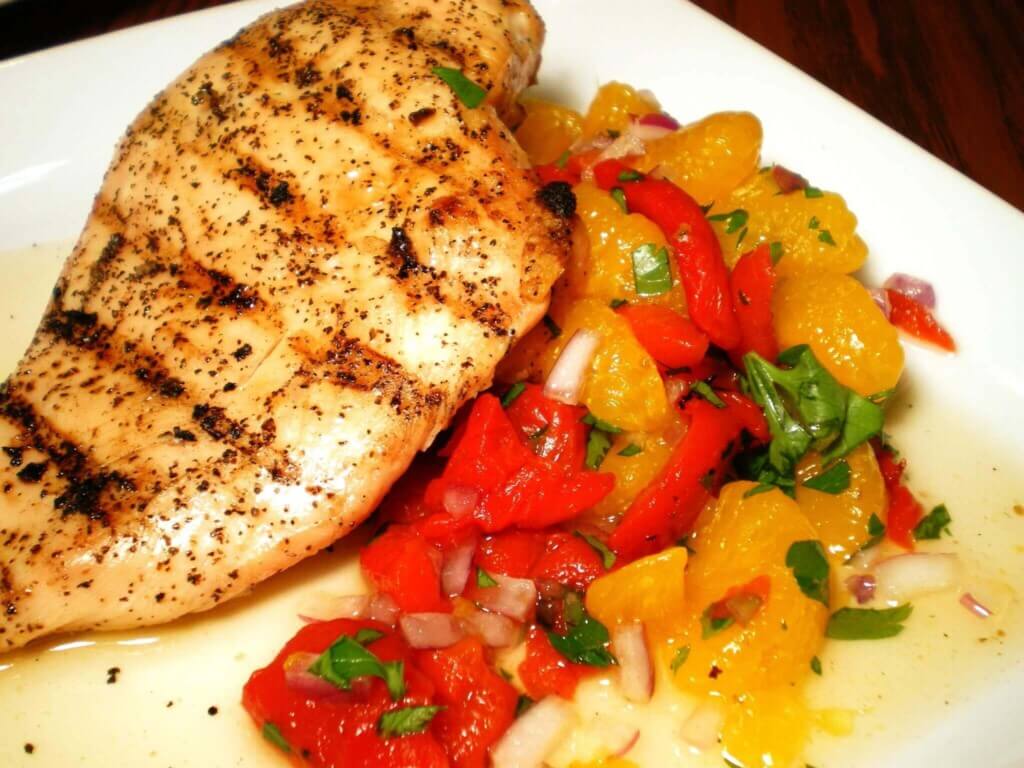
4. Baking/Roasting
  • Baking in your oven is a perfectly healthy way to cook, though it’s preferable to use a lower temperature and a longer cooking time than a higher temperature to cook the food more quickly (roasting is typically done at a higher temperature). You can bake meat, fish, poultry, veggies, bread, fruit and anything else. To keep in some of the moisture, try keeping your baking dish covered.
  • Alive in 5: Raw Gourmet Meals in Five Minutes is the perfect cooking companion for anyone who wants to get more fresh, healthy and great-tasting foods into their diet — but doesn’t have a lot of time to do it.
5. Stir-Frying
  • Stir-frying is a fast, healthy way to cook. Chop your meat and veggies into small, uniform pieces, add a little oil or broth to a pan or wok, then stir the foods until they’re just cooked through (add meat, which takes longer to cook, before the veggies). To preserve the nutrients in the veggies, cook them only slightly.
6. Braising
  • When you braise a piece of meat or fish, you brown it slightly in a pan, then cover it with a small amount of liquid such as broth. The pan is covered, and the food is left to slowly and gently finish cooking. After the food is removed, the leftover juices can be used to make a flavorful sauce.

7. Boiling
  • Boiled foods are healthy in that no harmful substances form when using this cooking method. However, there is some concern that nutrients may be lost when foods are boiled, and they may become overcooked. Steaming is a preferable cooking method to boiling.
  • Want a break from the stove? Try a raw smoothie for breakfast or a snack. All you need is a blender, some fresh or frozen fruit, and, if you like, some kefir, yogurt or whey protein powder.
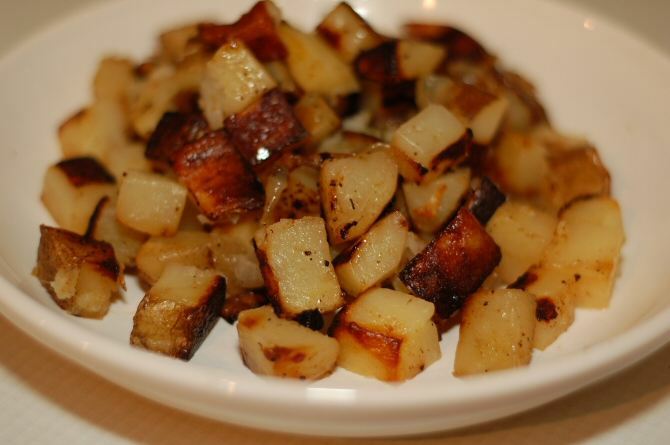
8. Sauteing
  • Sauteing (cooking foods in a small amount of oil on your stovetop) is an acceptable form of cooking, although it does pose the problem of oxidizing oils. To avoid this, replace the oil with some broth instead and don’t turn the heat up too high.
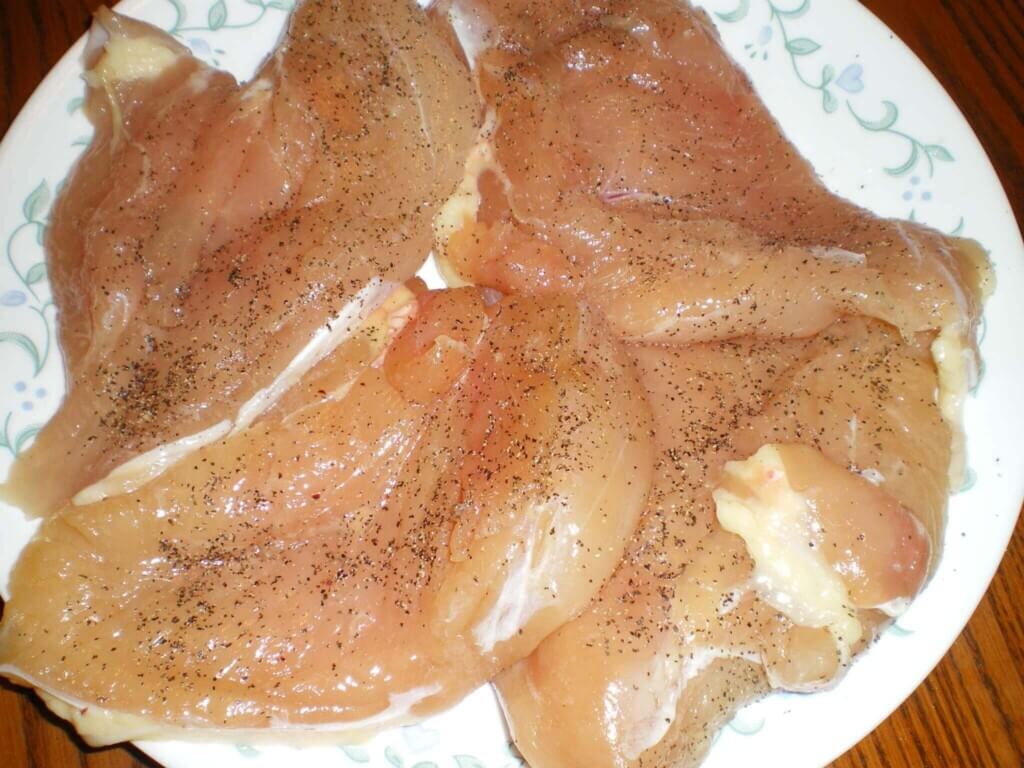
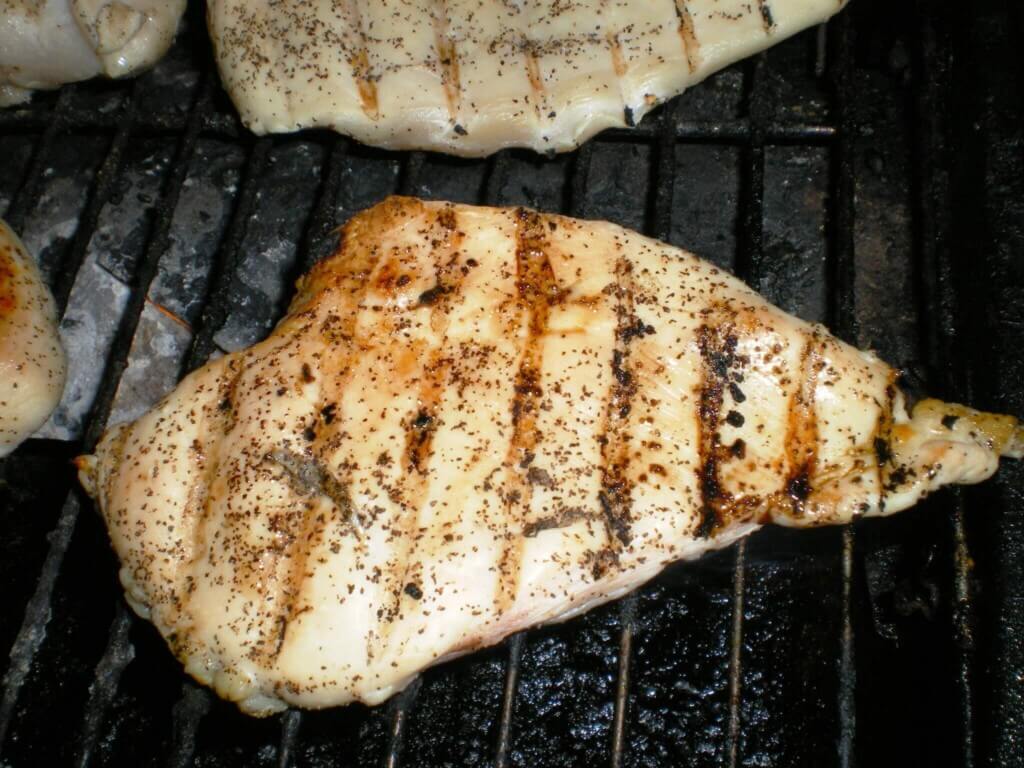
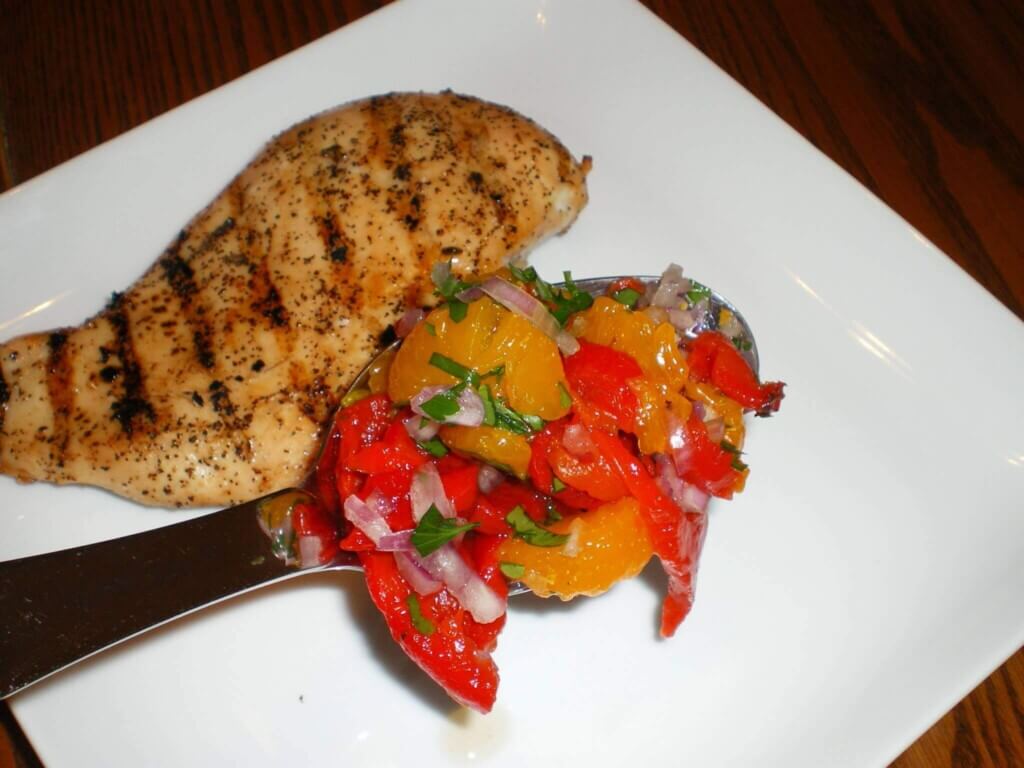
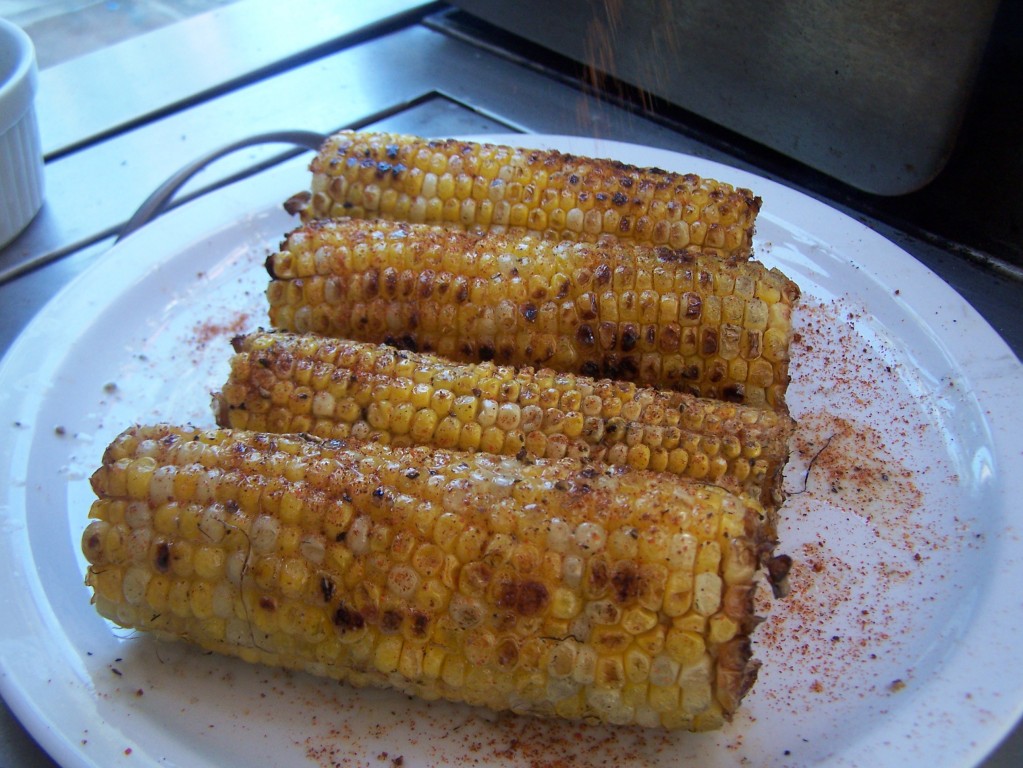
9. Grilling and Broiling
  • Many people love to grill their foods, however there are some potential problems to be aware of. Barbecue grill smoke contains cancer-causing chemicals known as polycyclic aromatic hydrocarbons. Meanwhile, heterocyclic amines form when food is cooked at a high temperature, such as those used in grilling and broiling. The chemicals have been linked to cancer.
  • Advanced glycation end (AGEs) products are also produced when meats are cooked at high temperatures. AGEs, according to researchers at Mount Sinai School of Medicine in New York, build up in your body over time leading to oxidative stress, inflammation and an increased risk of heart disease, diabetes and kidney disease.
10. Frying
  • Frying foods is the absolute worst way to cook your foods. The high temperatures produce cancer-causing heterocyclic amines, along with AGEs. Meanwhile, frying exposes your foods to large amounts of oxidized (rancid) vegetable oils, which then soak into your food and wreak havoc in your body. You should avoid frying your foods and use the cooking methods higher up on this page instead.
 HOW TO COOK CORN ON GRILL

Boil Corn Recipe

Boil Corn Recipe
INGREDIENTS :
8-12 ears corn unshucked (trim silky end)
8-10 onions (peeled
8-12 carrots (peeled)
8-10 bell peppers (halved and seeded)
8-10 potatoes (whole washed)
3 lbs. Polish sausage cut into 4" pieces
3 lbs. Italian sausage cut into 4" pieces
1-2 lbs. fresh green beans (whole, washed)
water
melted butter


PREPARATIONS :
  • Stand the ears of corn on the stalk end around the perimeter of a very large pot. Place all of the other ingredients in the middle. You can actually add ingredients until the pot is full.
  • Add about one inch of water to the pot. Cover, set stove to low setting, and let cook/steam very slowly for four to five hours. No need to disturb during cooking.
  • Serve with melted butter (add garlic to butter if desired) for dipping. This is an easy, nutritious, delicious meal for a crowd.
HOW TO COOK CORN ON GRILL

Boiling fresh Corn On the Cob

Boiling fresh Corn On the Cob
  • If there’s one thing that says “summer” to me, it might just be corn on the cob. When my family visited my grandmother in Michigan every summer, “Doo-Dah” would bring us corn on the cob for the requisite family cookout. My dozens of cousins and second cousins (well, close to dozens) and I sat in the yard, shucking the corn and taking off as much of the silk as we could, happily anticipating the feast ahead.
  • A few short hours later would find us happily munching the kernels off of the cobs, which we had buttered and sprinkled with salt. Delightful!
  • My father taught me how to eat the corn neatly so it wouldn’t get stuck in your teeth, by popping the kernels off one row at a time using your bottom teeth, rather than digging in with a CHOMP! It works, and has the added benefit of a typewriter joke. Finish the line of corn, say “Ding!” and start over. Well, that’s what my dad does anyway.
  • He also taught me the delights of eating leftover corn, still cold from the fridge, with a sprinkle of salt. It’s one of my favorite summertime treats to eat corn this way, so I usually get extras so I can intentionally have leftovers.
  • Unfortunately, when I moved out on my own, I discovered that I wasn’t actually sure about the right way to cook corn on the cob. I tried microwaving it, boiling it endlessly, seasoning the water with a variety of things… but nothing was ever quite right.
  • So after reading about a dozen “recipes” and formulas for corn on the cob, the guy and I settled on this method (which is a conglomeration of a couple different ones), which turned out to be a happy discovery. THIS is how corn on the cob shoud be!*
PREPARATIONS :
Fill your pot with water.
Add 1/4 cup to 1/2 cup of sugar.
Drop in your corn.
Bring everything to a boil, making sure the sugar is dissolved in the water.
Boil for no longer than 8 minutes.
Remove from the water and let it cool enough for handling and eating.
Handle it and eat it.


  • It was perfect! Well, almost perfect. It was early-season corn and not the best I’ve ever had, but it was delicious and cooked properly! With just a smear of butter and a few shakes of salt, it was delicious with our dinner of tomato pie.
  • And I had my 2 ears of leftover corn reserved in the fridge for later, when I enjoyed them cold, and sprinkled with salt.
  • Now that you’ve got such an easy delicious recipe for corn on the cob, don’t forget it!

HOW TO COOK CORN ON GRILL

Cooking Sweet Corn

Cooking Sweet Corn
  • Sweet corn is a treat to be savored every summer. Enjoy it in all its varieties, from golden to butter-and-sugar. The month of August always finds us chowing down on my favorite food and doing a lot of extra flossing! Here's how to cook sweet corn to bring out its incredible flavor.
INGREDIENTS :
A stock pot and lid
2 ears of corn per person
Butter, salt and pepper

PREPARATIONS:

  • Choose your sweet corn carefully: Whatever you do, don't buy the plastic-wrapped pre-husked corn. It's usually overripe and stale by the time it gets to the supermarket. In the Midwest, it's called 'feed corn', as in only suitable for feeding livestock. Pick sweet corn from your favorite roadside stand instead.
  • If the tassels are dry, or the outer leaves of the husk are yellowing, put it back. Choose ears that have tight, bright green husks and healthy, light golden tassels. You can be assured those are the freshest.
  • Pull back the husk. The kernels should be firm, uniform in shape, and free of bugs. If the kernels are too big, put it back - it's overgrown and won't taste good.
  • At home, strip off the rest of the husk and cornsilk. Rinse thoroughly in tap water.
  • In your stockpot, bring enough water to cover all the ears to a rolling boil.
  • When the water is boiling hard, turn the burner off, drop the ears in, and cover tightly. Let sit for 5 minutes. The worst thing you can do to sweet corn is overcook it or boil it for ten minutes or more. Just let it sit in the hot water, and it will be perfect every time.
  • Sweet corn in season doesn't need butter, salt or pepper - the natural flavors are perfect all by themselves. That doesn't mean you can't slather and season if you want to. Enjoy!
HOW TO COOK CORN ON GRILL

Cooking Corn

Cooking Corn
  • There is nothing like fresh corn on the cob, quickly boiled, spread with lots of sweet butter, and sprinkled with salt. Two ears per person may seem like a proper serving, but appetites run high when corn is in season and freshly picked.
PREPARATIONS :
  • Just before cooking, husk the corn, pull off the silky threads, and cut out any blemishes with a pointed knife. Drop the corn into a large pot filled with boiling salted water. Cover the pot and let the water return to a boil again, then turn off the heat and keep the pot covered. After about 5 minutes, remove enough ears for a first serving. You can keep the remaining corn warm in the water for another 10 minutes without its becoming tough. Serve with lots of butter and salt.
1.Shuck corn by removing husks and silk.  (To remove pieces of clingy silk use a moist paper towel and wipe in a downward motion, from the stalk to the tip of the cobb).

2.Boil 4 quarts of water in a lidded stockpot.  DO NOT add salt to the water – it will make the corn tough.  Make sure the stockpot is large enough to hold all of the corn and the water is high enough to cover the corn once it is added to the pot.

3.Once boiling, add 1 tsp. sugar to the boiling water and continue to boil for 1 minute.  Add the cleaned pieces of corn to the boiling water.  Cover the pot, turn off the heat, and cook the corn for 5 minutes.

4.Remove the corn from the water and serve.
Note:  Extra corn can be left in the hot water, covered with the lid, and kept warm for second servings. 

HOW TO COOK CORN ON GRILL

How to Grill Corn on the Cob

How to Grill Corn on the Cob
  •  Corn  on the cob is a sure sign of summer. The classic cob can compliment nearly all barbecued dishes. Save yourself a little time, and a lot of heat in the kitchen by throwing your cob on the grill with the rest of your dinner.
INGREDIENTS :
Grill
Tongs
Gas
Butter
Matches
Water
Large pot for soaking
Charcoal
Corn on the cob
Lighter fluid

PREPARATIONS :

  • Purchase fresh corn on the cob. When you pick out your corn, be sure to partially peel back the husk and silk so that you can be sure you're getting a good ear.
  • Remove as much of the corn silk as possible without removing the husk. Excess silk will burn while the corn is on the grill
  • Soak the corn in water for 15 to 20 minutes. This will ensure that you can cook the corn for a long enough time without it burning.
  • Take the corn out of the water, and shake off any excess. You want the corn wet, but not dripping.
  • Place the corn on the grill, and close the lid. A gas grill should be on medium heat. If you're using a charcoal grill, make sure the coals are no longer flaming.
  • Turn the corn every 10 minutes. Don't forget about this step or your corn will be charred on one side. You want the corn to be evenly cooked and browned. When the corn husk is charred and nearly black, your corn is done.
  • Remove the corn from the grill. Carefully remove the husk and remaining corn silk. The corn will be very hot. Butter and salt it, and it's ready to eat.
HOW TO COOK CORN ON GRILL :

Roasted Corn Ingredients

Roasted Corn Ingredients
  • The couple of lil gem squashes from my most recent CSA share had been staring at me from across the kitchen table for a few days. They looked so diminutive and adorable but at the same time a little intimidating. Between the tough skin and their perfectly round shape, I was not sure I could cut them up without losing blood or finger. However, the promise of discovering another vegetable was too tempting so I finally tackle them today.
  • Roasting is my standard preparation for winter squashes. However, I really want to do something more special with these cute ones. They are the perfect size to be stuffed and already portioned for individual serving. Most stuffed squash recipes use a filling of sausages and/or grains. Not a big fan. When I saw this recipe from 101 Cookbooks, my eyes lit up. This is my adaptation of the recipe after playing around with the proportions to my liking.
 INGREDIENTS :
2 gem squashes, halved and seeds removed
1 large egg
50g heavy cream
50g almond milk
1/4 tsp anise seeds, crushed
a pinch of grated nutmeg
1/4 tsp ground pepper
a pinch of fine sea salt
2 tbsp of finely chopped scallions, reserve a bit for garnishing
1 cup of corn kernels (I used frozen because it is middle of winter)
1/4 cup grated cheddar cheese

PREPARATIONS :
Preheat oven to 425F. Place the squash halves on a roasting pan and roast for 30 minutes until the flesh is tender.

While the squash halves are roasting, prepare custard. In a large measuring cup, mix together egg, cream, almond milk, anise seeds, nutmeg, pepper, salt, and scallions.

Remove squash halves from the oven and fill them with corn kernels until full. Reduce oven temperature to 375F.
Before you fill the squash halves with custard, you want to make sure that they are level so you can fill as much custard as possible without spilling. Here I set each squash half over a silicone muffin cup and readjust accordingly. They are more stable too! Fill the squash halves with custard until full.
 Bake for 15-20 minutes until custard is set and still a bit jiggly in the middle. Remove from oven and top with grated cheddar cheese.
Set oven to broil and broil the squash halves until cheese is bubbling and golden brown. Keep a very close eye on it. Depending on your oven, it takes approximately 3-4 minutes.
  • Garnish with reserved scallions and serve immediately. One per person for sidedish, or two per person for a vegetarian main course. Me? I can eat all four in one sitting. 
HOW TO COOK CORN ON GRILL :

Roasting Ears Corn

Roasting Ears Corn
INGREDIENTS :

  • 1/4 cup chopped cilantro leaves
Cilantro Lime Butter:
  • 2 sticks unsalted butter, at room temperature
  • 1/4 cup chopped cilantro leaves
  • 1 lime, zested and juiced
  • 2 teaspoons salt
  • 3/4 teaspoon cayenne pepper
PREPARATIONS :

  • Preheat oven to 400 degrees F.
  • Coat each ear of corn in 2 tablespoons of the cilantro lime butter and wrap individually in foil. Roast until hot and steaming, about 25 minutes. Serve with extra butter on the side.
  • Put the butter in a mixing bowl and, using a rubber spatula, mix in the cilantro, lime zest, lime juice, salt and cayenne. Use immediately or refrigerate.
HOW TO COOK CORN ON GRILL

Roasting Corn Bbq Pit

Roasting Corn Bbq Pit
  • I'm more than a little obsessed when it comes to roasted or grilled corn. Anytime we go to a State Fair or Sons of Norway festival, I head straight for the corn booth, wolf down 3 ears and then regret that I don't have room for a cream puff. Well, not until after we play Whack-A-Mole.
  • I've been working on the technique at home. Some folks like to peel back the husk, remove the silk, then tie the husk back up before roasting but I've never tried that. I just soak the whole ears in the sink or a clean bucket for 30 minutes, then roast for about 45 minutes over a moderate fire, turning occasionally. You can carefully peel back a bit of husk to see if the beautiful browning is starting to happen. When they are done, let them cool slightly, then peel the husk and remove the silk. I'd recommend gloves and you still have to be careful not to burn yourself.
  • The ancho chili butter I made to go with the corn has one of the highest yumminess to difficulty ratios of anything I've made in awhile. It tastes great right after you make it, but if you can let it rest in the refrigerator overnight, the fruitiness of the pepper comes out. Just be careful when working with the chilis so you don't get any hot stuff in your eyes or elsewhere. Wear gloves, and work over a surface you can easily clean.
  • Of course this technique of making compound butters can be applied to just about any herb, spice or flavoring you crave.
  • (Chili pepper can also be spelled chile pepper, and anchos are sometimes mistakenly called pasilla; if you don't have ancho peppers, you could also use (real) pasillas, New Mexicos, mulatos, or California chilis.) 
Ancho Chili Butter
Yields 8 tablespoons, enough for 6 ears of corn
Vegetarian and gluten-free, not vegan

  • 1/4 pound (1 stick) unsalted (sweet cream) butter, softened to room temperature
  • 2 dried ancho chilis
  • juice of 1/2 lemon
  • pinch of salt
1. Lightly toast the chilis using tongs over a flame, or in a dry skillet.
2. Allow to cool, then carefully (see discussion above), remove the stem and seeds.
3. If you have a mini food processor, put the chilis and the lemon juice in it and grind as fine as possible. You'll have to push it down a bunch of times. Then add the butter and salt and process until well mixed. The chilis will still be in small bits, not perfectly smooth, but they will soften in the butter so that is fine.
4. If you don't have a food processor, chop the chilis as fine as possible with a knife or use a mortar and pestle. Then mix in the butter and salt.
5. Refrigerate in a ramekin, or wrap into a log shape in parchment paper.

HOW TO COOK CORN ON GRILL

Wednesday, July 14, 2010

Roasting Potatoes Grill

Roasting Potatoes Grill
A cheap side dish to make that always gets the compliments.
INGREDIENTS :
potatoes (preferably red)
Med. to Lg. Onion (preferably Vidalia)
heavy duty tinfoil
butter
salt pepper
cheese
seasoning

PREPARATIONS :
  • Pull out a piece of aluminum foil and spray with Pam. Dice up potatoes approx. 2 per person. Cut onion into medium chunks. Mix these items in a bowl add salt and pepper to taste, and you can use a garlic seasoning or a fresh minced garlic. Add other seasonings to add different flavor.
  • After potatoes, onion, and seasoning mixed place on tinfoil curl up the sides to make a bowl. Now take another piece of tinfoil to place on top of bowl, spray with Pam. Add approximately 4-5 tbsp of butter. Sometimes I have added about a half bottle of beer.
  • Once you have the foil packed closed up and ready to go place on grill at medium heat allow approximately 45 min. before cooking meat. When the potatoes are soft take foil pack off grill and place cheese in pack then place in oven to keep warm.
HOW TO COOK CORN ON GRILL 

Make Grilled Peaches

Make Grilled Peaches
INGREDIENTS :
4 fresh peaches
4 teaspoons olive oil
4 tablespoons honey
4 scoops vanilla ice cream (or flavor of choice)

PREPARATIONS :

  • Preheat the grill to medium heat and brush the grates with oil.
  • Wash the peaches; then cut them in half.
  • Remove the pit from each peach. You may have to use a spoon to pry under the pit and loosen it.
  • Brush the cut side of the peaches with olive oil.
  • Place the peaches on the grill cut side down.
  • Grill for 3-5 minutes or until the peaches start to soften and show nice grill marks.
Serve each peach with a scoop of ice cream and a drizzle of honey.

Serving Description: 1 peach
Servings: 4
Container: grill, individual dessert bowls
Prep Time: 5 minutes
Cook Time: 5 minutes

HOW TO COOK CORN ON GRILL :

Make Baked Corn

Make Baked Corn
INGREDIENTS :
4 cans (11 oz each) whole kernel corn
1 ½ cups of milk
2 eggs
1 T. plus 2 tsp flour
2 T. sugar
1 ½ tsp salt
1 ½ qt casserole dish

PREPARATIONS :

  • The first step to making baked corn is to drain your corn well, and then run the corn very briefly through a food processor.
  • The next step to cooking baked corn is to beat the two eggs with a fork.
  • Then, combine the flour with a little of the milk.
  • Stir together the rest of corn, eggs, milk, flour, sugar and salt.
  • Finally, pour the baked corn mix intoa 1 ½ qt casserole dish and bake @ 325* for 1 ½ hours.
  • Corn Recipes are good recipes to learn to cook with. This baked corn recipe helped me learn to cook. If you have a recent grad, or another child heading away from home soon, help them learn to cook for themselves before they leave home.

HOW TO COOK CORN ON GRILL

Make Boiled Corn

Make Boiled Corn
  • Yummy! Fresh corn on the cob is so good! But it loses a lot when not cooked properly, ending up with corn that is very tough. I'm going to tell you how to make perfect, tender, delicious corn on the cob, every time.
INGREDIENTS :
large pot
fresh corn on the cob
water
stove
healthy margarine or spread
salt, pepper
timer

PREPARATIONS :

  • It is important that you start with fresh, ripe corn! Select your corn wisely. And cook it within a day or so of buying it, preferably the same day.
  • Fill a large pot with cold water, about 2/3 full. Put in on the stove and turn the burner on HI.
  • While you're waiting for the water to boil, start shucking the corn. Pull the leaves back and off, break off the stalk, and use a very, very soft brush to get all the "silk" off. (These are available in grocery and department stores in the utensils section. You can also pull them off with your hands).
  • When the water has reached a full, rolling boil, drop each cob in. Set your timer for exactly 12 minutes.


  • When the timer goes off, the corn is done, and you should very quickly remove it from the pot. If corn is cooked either too little or too long it will be tough. That is why timing it is crucial. If you try just checking for tenderness, you won't know if it is tough because it is underdone or overdone.
  • Seasonings are best applied immediately, except salt. I put the cobs into a shallow dish and put a healthy spread or butter on, rolling the cobs to coat them lightly. Some people also add pepper. Best to let people add salt at the table, as it can affect the texture of the corn.

HOW TO COOK CORN ON GRILL

Make Roasted Corn

Make Roasted Corn
INGREDIENTS :
2 strips bacon
1/2 onion diced
3 large cobs of corn
1/2 cup half and half or whole milk
2 cups chicken stock
Salt and pepper to taste

PREPARATIONS :

  • 1. Heat grill to high.
  • 2. Place husked corn on direct heat and turn down the grill. If using a charcoal grill, place on indirect heat.
  • 3. Grill for about 5 minutes a side or until the kernels start to brown. You may even hear a popping sound.
  • 4. When corn is thoroughly cooked, remove it from the grill. Set aside to cool.
  • 5. Chop bacon into small pieces and cook in a medium pan. Add the diced onions when the bacon is 2/3 cooked through. Continue cooking until bacon is crispy and onions cooked through.
  • 6. Trim kernels from the cobs. I place my knife at a slight angle, which makes it easier to remove the kernels.
  • 7. Place bacon and onions in a blender along with the corn, chicken stock and milk. Puree until the mixture reaches the consistency you desire. I like it mostly smooth, but with some small chunks. You can also use a hand blender.
  • 8. Place the soup into a medium-sized pot and heat through.
  • 9. Ladle into bowls and top with parsley pistou.

HOW TO COOK CORN ON GRILL

Make Grilled Asparagus

Make Grilled Asparagus
  • Outdoor grilling season is finally here, and it is the perfect opportunity to sneak more delicious, healthy fresh vegetables into your diet. This easy grilled asparagus recipe uses extra-virgin olive oil and fresh or dried herbs. It makes an excellent complement to any grilled fish or meat dish.
PREPARATIONS :

  • Wash and clean one bunch of fresh asparagus and use a sharp kitchen knife to trim the woody ends. Approximately one to two inches should be trimmed off of each asparagus spear.
  • Place asparagus spears in a re-sealable plastic bag and add one to two tablespoons of extra-virgin olive oil, a pinch of coarsely grated sea salt and fresh ground pepper, one clove minced fresh garlic, and a teaspoon of dried or a handful of fresh chopped rosemary. Toss asparagus and all other ingredients until each spear is well coated.
  • Put asparagus spears on a sheet of aluminum foil heavy enough to place directly on grill rack. Spray foil with cooking spray to prevent sticking. Heat charcoal grill, or gas grill and cook asparagus spears over medium to low heat for 7-10 minutes, depending on how crunchy you prefer them to be. Enjoy!
HOW TO COOK CORN ON GRILL

Make Grilled Chicken

Make Grilled Chicken
  • I was thinking of what to prepare for dinner last night while doing the groceries. The fresh chicken breast caught my attention and the light bulb in my head immediately lit-up. Grilling the chicken is the thing that I have in mind and the only challenge left is to have a unique salad idea to compliment the chicken.
Based on experience, I had 2 facts about Grilled Chicken that I used as a basis in selecting the salad ingredients.
  • 1. It goes well with fruits
  • 2. It easily absorbs sauce.
  • It just happened that I am passing by the canned fruit isle and mandarin orange segments were the first ones that I saw. Since Mandarin orange is a fruit and it contains juice, it can be a perfect candidate. Grilled red bell pepper is the next ingredient to have but I settled on bottled grilled sweet pepper because bell peppers (capsicum) are so expensive at this time (I wonder why). I also got some shallots and parsley for additional spice and aroma.
  • After tossing the salad ingredients, I scooped a spoonful to judge the taste. I never expected the concoction to taste that good. I was really amazed.

Try this out and let me know what you think.
INGREDIENTS :
4 pieces chicken breast, boneless
11 ounces whole peeled mandarin orange segments, drained
4 ounces sweet roasted pepper, drained
3 tablespoon shallots, minced
2 tablespoons parsley, chopped
1 teaspoon salt
1/2 teaspoon ground black pepper

PREPARATIONS :
1. Combine mandarin orange segments, sweet roasted pepper, shallots, and parsley.
2. Toss the ingredients to be evenly distributed. Refrigerate for at least 2 hours.
3. Rub salt and pepper on the chicken breast and let stand for about 30 minutes (for the chicken to absorb the flavor).
4. Grill the chicken breast.
5. Transfer the grilled chicken breast to individual plates and place Mandarin Salad on the side.
6. Serve. Share and enjoy!

HOW TO COOK CORN ON GRILL 

Make Grilled Vegetables

Make Grilled Vegetables
  • Grilled vegetables are never a wrong choice. They compliment just about any type of meat and are super easy to make. The variety of colors of the vegetables in this recipe make for a beautiful and festive table setting.
Prep Time: 10 minutes
Cook Time: 15 minutes
Total Time: 25 minutes

INGREDIENTS :
2 eggplants
1 large onion
2 red bell pepper
2 green peppers
2 zucchinis
1/4 cup olive oil
salt and pepper to taste

PREPARATIONS :

  • Prepare grill or 400 degree oven.
  • Cut eggplant into large pieces. Remove peel from onions and quarter. Slice and deseed bell peppers. Slice zucchini into 1/4 inch slices.
  • Place vegetables onto a large sheet of aluminum foil. Sprinkle with olive oil, salt, and pepper. Cover tightly with aluminum foil.
  • Grill for 15-20 minutes, or until vegetables are tender, yet a little crisp. Or bake in a 400 degree oven for 30 minutes.
HOW TO COOK CORN ON GRILL

Make Grilled Potatoes

Make Grilled Potatoes
INGREDIENTS :
3medium potatoes (1 1/2 pounds)
1/3cup butter or margarine
1/2teaspoon salt
1/8teaspoon ground red pepper (cayenne)
1/8teaspoon garam masala, if desired
1large garlic clove, finely chopped


PREPARATIONS :
  • 1.Place potatoes in enough water to cover (salted if desired) in 3-quart saucepan. Cover and heat to boiling. Boil about 15 minutes or until almost tender; drain. Cool slightly.
  • 2.Heat coals or gas grill for direct heat.
  • 3.Heat remaining ingredients to boiling; remove from heat. Cut each potato lengthwise into 4 or 5 slices. Brush potatoes generously with butter mixture.
  • 4.Cover and grill potatoes 4 inches from medium heat about 20 minutes, turning and brushing 2 or 3 times with butter mixture, until golden brown and tender. 
HOW TO COOK CORN ON GRILL

Ways to Grill Corn

Ways to Grill Corn
  • Corn is probably one of the most amazing treats one can grill. It requires in some cases almost no preparation, no eating utensils, and when fresh, doesn't even need dressing. Over the course of countless BBQs, some lucky accidents, and even my travels, I have learned some pretty amazing recipes for grilled corn. Detailed in this entry are just a small sampling of what I have learned.
The Easiest Grilled Corn 
  • This is almost a cop-out, but when you want corn, and you hate prep, this recipe is perfect. Simply remove the husk from the cob and wrap the puppy in tin/aluminum foil. Grill for about 15 minutes; but of course that depends upon how hot the coals are. If you want to spice it a bit, rub the corn with butter and pepper prior to putting it on the grill - thus allowing the grill to be cooked a bit by the butter.
Grilled Corn au Naturel 
  • This is wonderful and also very easy, the result is something you don't encounter in the states very often. In fact the first time I had it was when my wife and I went to Oaxaca... but that is another story. In any event, remove the husk from the cob and place the corn on the grill. Don't be afraid to let parts of the corn get dark brown or even black. Cook for 8-14 minutes until golden brown. When you are done, dress the corn as you might normally: with butter. Or for a slightly different experience - slice a lime and rub the lime over the cob, then sprinkle chile powder, or better yet: Tony's.
Grilled Corn in the Husk
  •  This is my favorite, but is one of the more annoying to prepare... but it is well worth it. First, carefully  peel back each leaf of the husk - don't be too hasty and break or crack the husk! When the husk has been peeled back, remove the silk. Then rub melted butter all over the cob, and then one-by-one, "unpeel" the husk leaf-by-leaf. Tie the husk at the top of the corn with a string, and soak the cob in water (or better yet: MILK) for about 30 minutes. This is done so that the husk will not catch fire. Then place on the grill for about 15 minutes, or until cooked. Then enjoy.
HOW TO COOK CORN ON GRILL

Grilling Corn Oven

Grilling Corn Oven
  • Just thinking about grilled corn can make your mouth water. Too bad it started raining and you will have to wait until it stops to start the grill so you can enjoy the yummy kernels--unless you whip out a grill pan and use it indoors to cook your corn in the oven. The grill pan is a pan with raised ridges that leave grill marks on food cooked in it. It is simple to use and is a method that requires no charcoal or propane, so you'll save money. The finished corn will be hot and tender, and you'll want to use this alternative method of preparing corn more often.
INGREDIENTS :
Water
Paper towel
Non-stick spray
Grill pan
Mayonnaise
Parmesan cheese
Pepper


PREPARATIONS :
  • Remove the husks and silk from the corn. Rinse the corn in water and pat dry with a paper towel.
  • Spray the grill pan with non-stick oil. Turn the oven on to 350 degrees and put the pan in the oven to warm up for 10 minutes.
  • Smear mayonnaise on the corn and sprinkle it with Parmesan cheese and black pepper. Remove the pan from the oven, place the corn on it and put the pan back in the oven.
  • Wait 10 minutes before turning the corn. Cook an additional 10 minutes before removing the corn from the oven. The pan will leave grill marks on the food.
HOW TO COOK CORN ON GRILL :

Grilling Corn On the Cob

Grilling Corn On the Cob
  • There’s nothing quite as easy as grilling corn on the cob. Grilled corn on the cob is not only tasty, but grilling your corn never fails to impress your guests.
  • There’s lots of ways to prepare corn on the cob, but I only eat my corn one way of course, and that’s grilling it. Grilled corn on the cob is super easy to prepare, and it looks and tastes great. There’s two basic theories on grilling corn on the cob, with foil and without.
Grilling corn on the cob with foil
  • Some people like grilling corn on the cob by wrapping it in aluminum foil or its own husk, packed with butter and seasonings, then baking it on the grill until done. While this does indeed cook the corn, and it does taste pretty good, it’s not really grilling now is it? I mean if it’s wrapped in aluminum foil it doesn’t get any smoke, or char, or magic grilling vapors, or any of the other things that make up the beauty of grilled corn.
Grilling corn on the cob with direct heat
  • Let me explain how I go about grilling corn on the cob. The way I prefer grilling my corn is by placing it directly on the rack over high heat where it can catch a little flame. This grilled corn recipe, if you want to call it that, couldn’t be simpler.
  • Start your fire or preheat your gas grill on high, then peel the husk and silk away from the corn before grilling. If you want to make a nice presentation, you can save the corn husks and use them as decoration when serving. In any case, throw away the silk, which is not good for much of anything.
  • Next, drizzle the corn on the cob with a little olive oil. I’ve tried using herbed butter instead of olive oil, but I think garlic butter is best applied after the corn comes off the grill.
  • Place the corn on the cob directly on the grill grate over high heat. Grill the corn on the cob for about 10 minutes, rotating the corn as needed to keep it from getting charred too much on one side. What you are looking for is enough time to lightly blacken some of the kernels. Don’t overcook the corn however or it will become mushy. You know when you’ve gone too far if the corn cob flexes easily in your hands.
  • After grilling the corn on the cob, season with salt and pepper and a slather of butter if desired. For a twist, I like to sprinkle Old Bay seasoning on grilled corn, which calls to mind the corn cooked in crab boil.
HOW TO COOK CORN ON GRILL :

bbq chicken grill

Barbeque Chicken Grill
  • Done right, grilling imparts additional flavor and eye appeal to chicken, but the trick is to avoid the overdone-outside-underdone-inside trap. Fortunately, there are a number of methods that will consistently produce perfectly cooked, gorgeous results. Partially cooking the chicken in advance of grilling (see Method 1) is one way, but grilling raw chicken can produce excellent results with both boneless and bone-in chicken pieces.
PREPARATIONS :

  • Always start with chicken you have thoroughly washed, dried, and trimmed of excess fat.
  • When ready to grill, heat either a charcoal or gas grill to a medium heat level, about 300° F, or until you can hold your palm over the heat at about cooking level for approximately 4 seconds. Make sure the grate is good and hot, and it can be useful to either brush it with oil, bacon grease, or use a grill non-stick spray just before adding the chicken.
  • If the cooking temperature is too hot, the outside of the chicken will cook too fast. The result is either a dried out piece of meat or it will be charred on the outside while still raw on the inside, so producing outstanding grilled chicken depends on indirect heat, cooking temperature, and timing.
Method 2: How to Grill Raw Chicken
  • Bone-in and boneless chicken can be cooked on the grill from the raw state. Bone-in will take more time to cook thoroughly. Clean the chicken and prepare the grill as noted above. The secret is to sear the chicken over direct heat to retain juices and then finish cooking with indirect heat. Chicken can also be marinated in advance to add additional moisture, especially if a sauce is not used during the grilling process.
1.  Brush chicken pieces with olive oil and season with salt, pepper, spices, or rub.
2. If using charcoal, when the coals are ready spread them evenly over only one-half of the grill bottom. If using gas, turn off one burner after the grill is preheated.
3. Place chicken skin side down directly over the hot coals or gas flame and cover the grill.
4. Cook until the skin is seared; turn and sear the other side. Keep the grill covered while cooking, but watch for flare-ups.
5. When both sides are seared, remove chicken to the side of the grill without the coals or the gas flame to finish cooking over indirect heat.
6. At this point sauces can be applied to the chicken if desired. These three sauces are easy to make and delicious on chicken, beef, pork, or seafood.
7. Turn the chicken every 10 minutes or so and brush with sauce again until the chicken is done with an internal temperature of about 160° F. Boneless breasts will cook thoroughly in only 15-20 minutes. Meaty, bone-in pieces will require 35-45 minutes of cooking over medium-low heat.
8. When the chicken is done, place over direct heat for a few minutes to caramelize the sauce and add deeper color if desired.

That’s all there is to it. Watch it, turn it, baste it, and enjoy the accolades for mouthwatering grilled chicken!

HOW TO COOK CORN ON GRILL

Barbeque Corn Grill

Barbeque Corn Grill
  • We like to grill corn in the summer because it is always so sweet and fresh. Sometimes we par-boil it fist and then place it on the grill. But sometimes we simply place the corn on the grill raw and let them cook slowly. Today we did just that! We also went ahead and powdered them with chile con limon, chili powder and lemon which I bought at the Mexican supermarket. If you can not find chile con limon you can use lemon juice and chili powder. Simply squeeze the lemon into the butter and sprinkle the corn with the chili powder.
  • For this recipe you will need corn on the cob, butter, coarse salt, freshly ground pepper and, if wanted, chili powder. Melt the butter in a small container and season with salt and pepper. Place the corn on the grill and cook it on high heat for 12 to 15 minutes, flipping it as it browns. Baste it with melted butter every time you flip it.
 Remove the corn from the grill and coat with extra melted butter.
If using chili powder sprinkle it on both sides. Serve.
HOW TO COOK CORN ON GRILL:

Barbeque Potato Recipe

Barbeque Potato Recipe
  • I was thinking of throwing in some type of generic, I’m-from-Idaho-so-I-know-potatoes  comment here, but I’m not actually from Idaho. And loving spuds is kind of a universal thing, isn’t it? So what is the use? I lived in Idaho for seven years. I’ve never grown a tater in my life. I’m not an expert here.
  • What I can say is red potatoes–and purple/blue potatoes–are my favorite. Although I do love a giant baked potato, too, the doctor says I should avoid them because of my insulin issues. But red and blue are a-ok. And that makes, by extention (and a stretch) red-skin potato salad OK, too, right? Sure.
  • This recipe comes from allrecipes.com. Because I like allrecipes.com. Scratch that. I LOVE allrecipes.com  If you click the link, you can read a bunch of comments and variations on the recipe, plus the nutritional content info.
INGREDIENTS :
1 lb potatoes, peeled
3 tablespoons butter or spread
1/2 teaspoon garlic powder
1/4 cup bbq sauce
2 tablespoon vinegar
1/2 cup sharp cheese, shredded

PREPARATIONS :
1. Bring a large pot of salted water to a boil. Add potatoes and cook until tender but still firm, about 15 minutes. Drain and set in the refrigerator to cool.
2. Place eggs in a saucepan and cover with cold water. Bring water to a boil and immediately remove from heat. Cover and let eggs stand in hot water for 10 to 12 minutes. Remove from hot water, cool, peel and chop.
3. Place bacon in a large, deep skillet. Cook over medium high heat until evenly brown. Drain, crumble and set aside.
4. Chop the cooled potatoes, leaving skin on. Add to a large bowl, along with the eggs, bacon, onion and celery. Add mayonnaise, salt and pepper to taste. Chill for an hour before serving.


HOW TO COOK CORN ON GRILL

Cook Potatoes Microwave

Cook Potatoes Microwave
  • Here is a quick lesson on how you can cook potatoes in the microwave. This is great for the busy mom who needs to get dinner ready quick. It is also great for those hot summer months when you don't want to turn on your oven or stove.
  • I use Tupperware's Rock N Serve medium or large deep container depending on how many potatoes I am using. Try to find a microwave safe container that is deep if you don't have the Rock N Serve containers.
Peel and cut your potatoes into quarters.
  • Place in your microwave safe container. You may need to add water. If you are using the Rock N Serve container you don't need to add any water.
  • Microwave on high for one minute per potato. If you have 15 potatoes you would cook for 15 minutes. Stir every five minutes to avoid hot spots. This is for average size potatoes.
  • You can then use the cooked potatoes in your recipes. Here are a couple of examples.
For mashed potatoes:
  • Heat butter and milk in a small microwaveable container. Pour into the container your warm vegetables are in. Add seasonings to taste and serve.
For home fries:
  • Cut potatoes in bite size pieces rather than in quarters before cooking in the microwave. Saute chopped onions, green peppers, and paprika in a large frying pan. Add cooked potatoes. Raise the heat and fry to taste.
For potato salad:
  • Keep the potatoes in the container after cooking and place in a cool sink or dish pan in ice water. This will help to cool the cooked potatoes quickly. Make your favorite potato salad mixture and add to the potatoes once they are cooled. For example, I add Miracle Whip, chopped olives, and chopped boiled eggs because that is how my family likes their potato salad.
  • As you can probably see by now, you can use your own recipes once the potatoes are cooked. Cooking them in the microwave is just a faster and cooler way to cook the potatoes.
HOW TO COOK CORN ON GRILL :

Baked Potato Barbecue

Baked Potato Barbecue
INGREDIENTS :
1 large baked potato
1/2 pound grilled turkey, pulled pork, or BBQ ribs
1 tablespoon Neely's BBQ sauce, recipe follows
1/2 cup grated Cheddar, plus more for garnish
Sour cream
 

PREPARATIONS :
  • Preheat oven to 400 degrees F.
  • Split and scoop out potato flesh. Add your choice of meat, Neely's BBQ sauce and cheese, to the potato flesh. Stuff potato shell with mixture and bake for 10 minutes or until heated through. Top with sour cream and garnish with cheese, to taste.
 Neely's BBQ Sauce:
16 ounces ketchup
8 ounces water
3 ounces brown sugar
3 ounces white sugar
1/2 tablespoon freshly ground black pepper
1/2 tablespoon onion powder
1/2 tablespoon dry mustard powder
1-ounce lemon juice
1-ounce Worcestershire sauce
4 ounces apple cider vinegar
1-ounce light corn syrup
2 ounces Neely's BBQ Seasoning, recipe follows
Combine all of the sauce ingredients in a stockpot or large Dutch oven. Bring to a boil over high heat, stirring frequently to prevent sticking. Reduce temperature to low and simmer, uncovered, for at least 2 hours.
Yield: 1 quart sauce


Neely's BBQ Seasoning:
4 ounces paprika
2 ounces white sugar
1 teaspoon onion powder
Mix all the ingredients and set aside.
 

HOW TO COOK CORN ON GRILL 


Tuesday, July 13, 2010

Grilling A Potato

Grilling A Potato
  • Potatoes are a perfect vegetable for the grill. You get an incredible amount of versatility out of this simple tuber; you can grill them while cooking other items and because they are so forgiving. There are several methods for grilling potatoes so you can cook them to fit any situation or meal. Because potatoes are so forgiving when it comes to cooking you don’t have to worry much. As long as they aren’t burnt you’re still in business. Potatoes can be baked whole or cooked up in slices.
BAKING
  • Baking potatoes on the grill is very easy and requires virtually nothing from you while they cook. Because of the intense heat of a grill and because you don’t want to do a lot of turning and watching while you grill your baked potatoes it is best to wrap them individually in foil. If you simply wrap potatoes up and throw them on the grill they will be flavorless and dry. Start by taking a piece of foil large enough for your potato. Pour about a tablespoon of oil in the center. Season with salt, pepper, herbs, or whatever you like. Place the potato on the oil and wrap it up. The oil will move around the potato while it cooks, keep it moist and the seasonings will add flavor. Place them anywhere on your grill that isn’t in the way. If you need your grill really hot it is best to place them away from the high heat, like an upper rack or off to the side. Your baked potatoes are done when a fork pierces to the center easily. Baked potatoes will take about 45 minutes to an hour to cook.
  • Slicing your Potato: When grilling potato slices you want something that is thin enough to cook quickly but thick and large enough that you won’t have trouble keeping them from falling into the fire. Typically you can do this in two ways. Wedges are made by cutting the potato in half lengthwise, then cutting that half into 8 long thin wedges. These are easy to work with and won’t fall into the fire if you keep them turned perpendicular to the cooking grate. Slices are perfect for packets. A good grilled potato slice should be about 1/4 inch thick (little over half a centimeter). 
Wrapped up in pieces
  • By cutting up your potatoes into thin slices or wedges you can get them to cook much faster. It is best to keep the packets relatively small, so if you need a lot of servings you might want to wrap up the potato pieces in groups. Take your sliced potatoes and place them on a sheet of foil large enough to wrap them up. Top with olive oil, balsamic vinegar, herbs, seasonings, bacon pieces, chopped onions, bell peppers, or virtually anything that isn’t going to burn up (like cheese will). Wrap tightly and throw on a medium hot grill. These packets will cook up in about 20 to 30 minutes. Check to make sure they are done before you pull them off the grill and be careful opening the packets because the steam inside can be around 500 degrees F (260 degrees C.).
Straight off the Grill:
  • You can grill potato slices or wedges quickly and easily on the grill if you are willing to keep a close eye on them. Your best bet is to cut the potatoes into long thin wedges. This will let them cook faster. You can peel them or leave the skins on. Once you have the potatoes chopped up toss them with a good oil and seasoning mixture. Italian dressing works great for this. Place them straight on the grill or in a grill basket over a medium heat and cook until they get soft. This will take about 20 minutes. You can baste them while they cook. You will need to flip your potato wedges periodically to prevent burning.
Short Cut Potatoes :
  • The fastest way to grill your potatoes is to parboil them first. This is done by taken your sliced potatoes and throwing them in boiling water for about 10 minutes. Drain and place on a medium hot grill and they will be cooked in another 5 to 10 minutes. When you take the potatoes out of the hot water it is best to drain them well and then coat with whatever seasonings sound good to you.  
HOW TO COOK CORN ON GRILL :

Cook Rice Grill

Cook Rice Grill
INGREDIENTS :
1 1/3 cups  Uncooked instant rice
1/3 cup Sliced fresh mushrooms
1/4 cup Chopped green pepper
1/4 cup Chopped onion
1/2 cup Chicken broth
1/2 cup Water
1/3 cup Ketchup
1 tablespoon Butter or margarine

PREPARATIONS :
  • In a 9-in. round aluminum foil pie pan, combine the first seven ingredients. Dot with butter. Cover with heavy-duty foil; seal edges tightly. Grill, covered, for 14-15 minutes or until liquid is absorbed. Fluff with a fork and serve immediately.
FOOD NOTE:
Nutritional analysis based on using low-sodium broth and reduced-fat margarine

HERES ANOTHER RECIPE FOR RICE GRILL :
Cook Rice Like Chipotle Mexican Grill
  • Anyone who has ever eaten at Chipotle Mexican Grill know that the rice  is the key element in what makes their food so good! After much trial and error (and eating too much rice!) I present to you my recipe for perfect Chipotle rice.
INGREDIENTS :
2 cups long grain white rice
1 bay leaf
1/3 cup chopped cilantro
1/3 tsp kosher salt
2 1/2 tsp lemon/lime juice
1/4 cup soy oil

PREPARATIONS :

  • Wash and rinse the rice until the water runs clear. This prevents it from sticking together and makes the finished product light and fluffy. Use a sieve for best results. Let the water run through the rice while moving it around with your fingers.
  • Cook the rice in the traditional manner. Use three cups of water for your two cups of rice. Add the bay leaf. Put a lid on the pot and bring water and rice to a boil, reduce to a simmer and cook for about 20 minutes. As soon as the rice is done cooking, remove the bay leaf, add the soy oil and fluff with a fork. Allow the rice to sit for 5-7 minutes before proceeding.
  • While the rice is cooking, give your cilantro a rough chop. Use mostly leaves, but some stems are acceptable. At Chipotle you'll find an even mix of the two.
  • Move the rice from the pot to a mixing bowl. Add the cilantro first and mix to prevent it from clumping with the other ingredients. Add the salt and juice, give it a good mix and taste. Perfect Chipotle rice!

HOW TO COOK CORN ON GRILL :

Cook Red Potatoes Grill

Cook Red Potatoes Grill
  • If you want a grilled steak with a side of potatoes, you can cook  everything outside on the grill. For your next cookout, instead of potato salad, try serving grilled red potatoes. These tiny tubers are often served whole or halved since they are only the size of golf balls. Unlike larger russet baking potatoes, red potatoes are less starchy and do not become fluffy when you cook them. Instead, they retain their shape, so if you can easily slice them after cooking, without the potato pieces falling apart. There are two methods to cooking small, red potatoes on the grill, and these instructions will outline both of these. 
INGREDIENTS :

1 lb. Red potatoes
Vegetable scrub brush
Soap
Water
Mixing bowl
2 tbsp. Olive oil
1 tbsp. Fresh crushed rosemary
Salt
Pepper
Metal or bamboo skewers
Large bowl of water
Heavy duty aluminum foil
Grill
Serving platter
Oven mitts
Grill tongs

PREPARATIONS :

  • Preheat the grill to medium heat. If there is something already cooking, such as meat, do not adjust the heat level since you just need the grill to be hot rather than a specific temperature.
  • Wash the potatoes in soap and water, scrubbing them with a vegetable scrub brush to remove dirt on the outside. Do not peel or cut.
  • Place the scrubbed potatoes into a mixing bowl.
  • If you are using bamboo skewers, immerse them completely into a bowl of water for at least ten minutes. This will prevent them from burning on the grill. You do not have to do this if you are using the metal skewers or aluminum foil.
  • Toss the potatoes with the olive oil, rosemary, and salt and pepper.
  • Thread three or four potatoes on each bamboo or metal skewer. Have at least 1/2" of space between the potatoes. See warning. This is only if you are using skewers.
  • Follow this step to grill potatoes in aluminum foil packets. Take a sheet of heavy duty aluminum foil about 12" x 12". Place three or four potatoes in the center and fold the foil in half, over the potatoes. Crimp the edges to ensure that the foil packet is sealed. Repeat with the remaining potatoes.
  • Place either the aluminum foil packets or the skewers onto the top rack of the grill, away from direct heat.
  • Let the potatoes cook on the grill for about 7-15 minutes or until tender. Turn the skewers or foil packets after every five minutes using the oven mitts or grill tongs.
  • Test the potatoes for tenderness before removing from the grill. You can test by inserting a skewer or knife into a potato. If it goes in easily, without resistance, the potatoes are done. Depending upon the heat of your grill, the potatoes could be done in as little as eight minutes or as long as 15 - 20 minutes. Watch the potatoes, and check regularly.
  • Serve one skewer or foil packet per person. You can also empty the foil packets or push the potatoes from the skewers onto a serving platter for a family style serving.


HOW TO COOK CORN ON GRILL :